Wednesday, March 14, 2012

Recipe Remake: thumbprint cookies with Hawaiian ingredients

I'm currently collecting recipes that can be made with only island-grown ingredients. Grains pose a particular challenge, since they are the staple of so many people's diets but aren't grown here. Breadfruit (called 'ulu in Hawai'ian) is a potential grain-substitute in many recipes. In addition to being a plentiful, local food, it is healthier than grains, too!

In the following recipe, I've adapted one of my favorite cookies to use 'ulu instead of flour, macadamia nuts instead of pecans, and coconut instead of oatmeal. It uses no additional sugar or oil. I used cardamom instead of more traditional spices, because I love the way the delicate complexity of the spice interacts with the sweet 'ulu flavor. Cinnamon, nutmeg, and other cookie spices could be used instead or in addition.

The resulting recipe is easy, healthy (for a dessert), and can be sourced completely locally! Plus, these cookies are gluten free and vegan, and still: delicious! The proof? They won Best of Show in the Puna 'Ulu Festival recipe contest a few weekends ago. It was my first cooking contest entry - I was so delighted!


*award winning* Pūnana Cookies

for about 2 dozen cookies:
1&1/2 cups ripe 'ulu, steamed - use breadfruit that is sweet and mushy
1 cup finely chopped raw, unsalted macadamia nuts
1/2 cup shredded, dried, unsweetened coconut
Pinch sea salt
1 teaspoon cardamom
tart jelly/jam - liliko'i ginger jelly is especially ono
Macadamia nut oil for pan, optional
Preheat oven to 350°F. 
Mash steamed breadfruit using a crank processor, a potato masher or a brief pulse in a blender.  The resulting paste should be sticky and clumpy, like buttermilk frosting.
Put the macadamia nuts, coconut, salt and cardamom in a mixing bowl and fold in the breadfruit paste, much like mixing butter into a batter until all the ingredients are well incorporated.
Either wipe a cookie sheet with macadamia oil or use a non-stick cookie sheet.  Take about one tablespoons of breadfruit batter and roll into a ball.  Form the dough into a nest with an impression on top for the jelly.  Wet hands can help form the well-structured nest.  Fill the sheet with the nests about 1 to 2 inches from each other.  Then add about 1/2 a teaspoon of jelly to each nest.  Liliko’i jelly is ono because of its bright, tart flavor, but any firm jam or jelly will work.
Put the cookie sheet into the oven and bake at 350 degrees F for about 20 minutes, or until the cookies are lightly browned on the bottom and/or top.  Remove and cool on a rack.  Enjoy!

Now the pictorial tutorial:


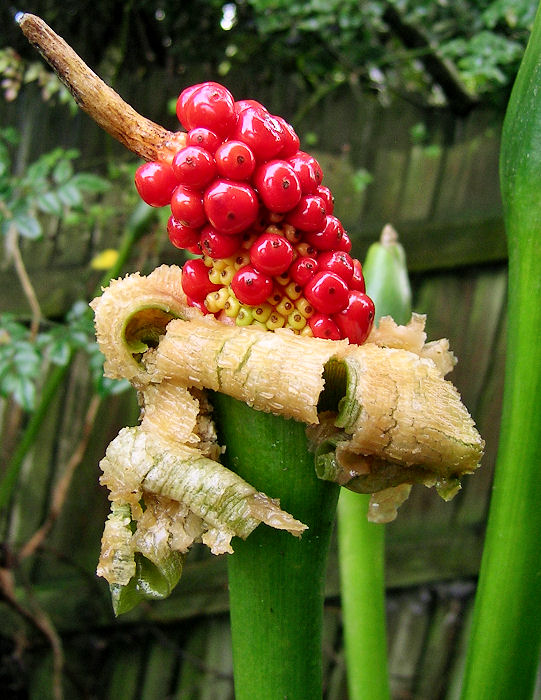
Choose breadfruit that is soft (from ripeness not from bruising!) - it will usually be a golden color, but sometimes still green. A 2 lb breadfruit should be enough for a single batch. Steam for about an hour, then cut off skins and cut into chunks.

We use a simple hand-crank food processor.

Not much processing is needed for ripe breadfruit. It's consistency should be somewhere between mash potatoes and frosting. If the breadfruit does not stick together, try adding a little splash of water.

Processed ingredients (breadfruit, coconut, nuts, cardamom, salt) before mixing.

I've found that folding the breadfruit into the dry ingredients, much like you would fold butter into flour, works well. Mix with a spoon or spatula until ingredients are evenly distributed.

Use a nonstick cookie sheet or grease a regular sheet. I put a light coat of macadamia nut oil on my non-stick sheets. The oil isn't necessary, but increases browning. Take about a tablespoon of batter an shape a nest. Make sure the sides and bottom are solid, so the jelly can't leak during baking.

Add about 1/2 teaspoon of jelly to each nest. I use my homemade liliko'i-ginger jelly. I think any tart, bright flavored jelly or jam would be delicious.

In my oven set to 350 deg F, these cook for 25-30 minutes. I take them out when they start to brown. Then, they cool on a cookie rack.
Using the same batter and adding dark chocolate chips instead of jelly makes pretty darn good chocolate chip cookies. These are made with Scharffenberger chocolate chunks my mom sent. Thanks, Mom!

Wednesday, November 2, 2011

Basic Banana Care

Bananas are an amazing resource for a tropical homesteader. They grow easily, fruit quickly, and can be used green, like a potato in stirfries, or ripe, for a sweet addition to breakfast, quinoa salads, or desert. Bananas are also very healthy: high in potassium and fiber and good for your heart, eyes, bones, kidneys, and more. They pack a serious nutritional punch. Here in the tropics, we are lucky to have access to so many different types of bananas. If you don't think you like bananas, you may not have tried the right type, yet. I can't eat a banana on the mainland anymore - I yearn for the tart apple bananas of Hawai'i.

The land we purchased here on Hawai'i Island already had two large, one medium, and a few small banana patches (called "mats"). In the 8 months we have lived here, we are so fortunate to have enjoyed an almost constant supply of bananas of various types: apple, Chinese dwarf, Jamaican red, and other types we haven't yet identified.

Since the banana plants had been neglected for years before we bought the property, it took a bit of work to clear out the vines and weeds that were taking over. We heard much conflicting advice about taking care of bananas, some of which may only apply in certain areas (depending on elevation, water, and wind). The following has worked in our location, but your mileage may vary.
After being ignored for about 5 months, our medium banana patch was looking a bit shaggy (left photo). After about 10 hours of work pulling weeds and cutting down old leaves, it is in much better condition (right photo).
To take care of a neglected patch, first pull the weeds under, in, and around the plants, then cut off the old leaves and lay them in between the plants. This will help block sunlight to deter new weed growth and it provides a source of food as the leaves decay back into the ground. Since we live on the rainy, humid side of the island, it is important to encourage good airflow through our plants, and cutting the old leaves does this. Thinning the canopy also allows more sunlight to filter down to the keiki growing underneath. I usually visit the patches about once a week for maintenance.

Bananas like water, and they like food. They don't like weeds sucking up their nutrients or vines inhibiting their growth. Here in Pahoa, rain provides plenty of water. Our kitchen sink also drains into one of the banana patches. Many people swear by fertilizing their bananas, with chemical fertilizers, organic matter, or even rodents caught around their property. Other than feeding our bananas weed-mulch and their old leaves, we haven't provided any extra food. We find that our banana bunches are not as big as those of our friends who fertilize, but we get more than enough bananas for our needs. If that changes, we'll change our plan.
apple bananas and blossom
 When a banana plant puts out a flower, its leaves will all die off. Some people wait to harvest until the bunch starts turning yellow.  Others, including me, harvest when the bananas are light green, full sized, and start to become rounded in their edges. I also usually wait until the whole plant - leaves and blossom - look dead. To harvest, cut down the whole plant, save the bunch, and divide the rest of the plant into logs that stay in the area to feed the new plants.

We rinse and hang the bunch to dry on the front lanai, then bring inside to ripen when still green. We've found that fruit flies are less likely to bother the fruit when it ripens inside the house. We have a rope suspended above our kitchen counter to hang our current banana bunch.

The banana mats renew themselves by constantly putting out new keiki vegetatively from their roots. We have learned that there are two kinds of keiki: the thin ones with big leaves never put out good fruit, while the keiki with fat bases and thin leaves do. I plan to mark the keiki and follow their progress to see if this is true for us. Banana plants usually put out more than just one replacement keiki, so the mats should be thinned to avoid overcrowding. The removed keiki can be moved to a different location or given to a neighbor. I still have (moral) trouble thinning plants, so I have just let the keiki be, and, yes, our mats are a bit crowded! I'll take this next step soon.
On the left: "good" keiki with thin leaves and thick stem. On the right: "bad" keiki with wide leaves and thin stem.

Want more banana info? Try promusa.org.

Thursday, October 27, 2011

DIY Simple Plant Markers

As I started collecting more and more plants, I realized that my brain may not be able to hold all the identification information I was forcing into it. To prevent my forgetting what plant was where, I would have to mark them. I was going to buy plant markers but realized that I could easily make some from supplies I already had. (Plus, the ones I envisioned were cuter in their rustic simplicity than the mass produced markers I found for sale.)
DIY plant marker made from a waiawi branch
Simple is the right word. It's almost rediculous to post a "tutorial" for these, but since our busy lives don't always allow room for thoughts of the obvious I thought this worth posting.

Once you have a dried branch of waiawi (strawberry guava) or other overly abundant wood ( I usually use a diameter of about 1/2 inch),  takes about a minute to make a few of these. All you need to start is a dried stick and a clippers.
basic materials: stick and clippers
Using the clippers, cut the wood into pieces that seem to be the right length. I make mine about 8 inches long, but I don't bother measuring. I generally use straight pieces, but a little curve at the top end won't hurt, and even can look cute.
shaved marker sticks
Next, shave off an inch to 1.5 inch of bark at the top end to expose some lighter wood. I hold the clippers open and use the top blade to do this, but you could also use a pocket knife or any professional whittling tools you may have.
labels added with a permanent marker
At this point, I used to wait a few days to make sure the inner wood was dry, but now I skip that step and immediately write the labels with a permanent pen - a micron pigma type works great. I briefly entertained the idea of using a soldering iron to burn in the labels, but that just didn't fit in to my need for immediate gratification. I bet it would look cool, though, so if you do that please send pix.

These have held up well for me, even in this wet climate. And none have grown into happy waiawi trees in the middle of the garden, so all is good. Best of all, my brain needs to keep track of fewer things.

Monday, October 24, 2011

Pua Kalo: the taro flower in our garden

We were completely surprised and delighted to find this flower in the kalo patch. I'd never heard of taro flowers! Since the plant is propagated through vegetative means, I guess I assumed that it didn't flower.

We only discovered this treasure it because of the sound. The sound of dozens of swarming fruit flies, that is. They were all over that flower for the first day it opened, when it had a wonderful rose-y-butter-y smell.

kalo flower just opening, surrounded by swarming fruit flies
oriental fruit flies on kalo flower
 By the next day the flies had completely disappeared, and the flower was open.

kalo flower day two, fully open and without scent or flies
So, of course, I researched a bit about kalo flowers. The "petal" is a leaf that protects the flower stalk. The stalk has female flowers on the bottom, male flowers on the top, and some sterile flowers in between. It turns out that flowering is rare, and the anatomy of the flower discourages natural pollination. If our kalo flower does get pollinated, it will form a bunch of berries at the base of the stalk (maybe looking like this). Plant breeding programs have found a way to induce flowering and hand-pollinate to attempt to make new and interesting varieties.

Since kalo is propagated vegetatively, by transplanting corms, the strains we use are clones of ancestor plants and don't have much genetic variation. The potential for breeding kalo is kind of exciting.

But, there are already a ton of kalo types and the ancient Hawai'ians were quite adept at knowing where and how to grow each. I should learn to handle the kalo we have before daydreaming about new varieties!

Thursday, October 20, 2011

Moringa - a vitamin pill in a leaf

Moringa (Moringa oleifera) is a beautiful tree native to India. Because its leaves can be used as a very nutritious, low-maintenance perennial vegetable, it should be a part of every tropical homesteader's yard. Check out this advertising copy from a Big Island company selling moringa powder (comparing gram for gram:

"7 Times The Vitamin C of Oranges
4 Times The Vitamin A of Carrots     
4 Times The Calcium of Milk
3 Times The Potassium of Bananas     
2 Times The Protein of Yogurt"

Sounds pretty good, huh? Overlooking the fact that several grams of milk are probably easier to fit into your diet than the same number of grams of moringa, it is pretty good. Actually, really good.

And that's just the leaves. So many other parts of the plants are edible that its been called a grocery store in a tree. Moringa pods are long and thin (giving it the common name "drumstick tree") can be eaten immaturely (and supposedly taste like asparagus) or the inside can be scraped out of mature pods similarly to an artichoke. The flowers are edible and said to taste like mushroom. Young roots and bark are sometimes used as horseradish, but there are conflicting reports about when/how you do this, so please research it first. I'll almost certainly be trying this it at some point and will report back.

The seeds are also edible and oil from the seeds (which are 40% oil) can be used as cooking oil, or even biofuel - if you can get enough! Also, the seeds can be used to purify water. I'll be trying that, too... stick with me!

Convinced you need a moringa tree or several? You do.

And it doesn't take much room. Moringa is a small tree (30ft/10m) but is often trimmed to be a shrub, so that picking leaves and pods is convenient. A moringa hedge sounds like a great idea! It grows well in tropical regions. It likes full sun, well-drained soil, and can tolerate drought.

A woman I recently met at the Puna Sustainability Fair said, "Uhg, moringa tastes terrible!" It turns out she was referring to moringa powder, which has rapidly been gaining shelf space in the vitamin section of natural foods stores. I don't have any experience with moringa powder, but I've found that fresh moringa leaves taste great.

I first learned about moringa in the book Perennial Vegetables. which has some basic information on growing and using moringa. I ordered seeds from ILoveMoringa.com, and about 2/3 germinated after soaking overnight and planting in potting soil. I kept a few seedlings and gave most away at the last BISS potluck.

moringa seedling
While I'm waiting for my plants to mature, I've been buying big bouquets of young moringa branches being sold as "moringay" for $1.25 at the Maku'u Farmer's Market. The fresh leaves plucked from the branch disappear almost without a trace into guacamole or on top of stir fries. It's a very easy way to pack more nutrition into a meal. I'm looking for recipes that use moringa in a sort of pesto-like spread. I think that would be delicious, but I haven't been able to locate on on the Internetz. I might have to invent one, and I'll it post here if it is a success.

Monday, October 17, 2011

Fubu - or blueberry guava or downy rose myrtle or whatever

We were introduced to the berries at a local farmer's market. "Try some blueberry guava," we were told. Blueberry guava? Of course - it was a small, deep purple-blue berry with the characteristic guava-propeller at one end. Months later, the name immediately resurfaced in my mind when I found them growing wild on our land. We have blueberry guava!

blueberry guava
Then the darnedest thing happened. Google had never heard of blueberry guava. After hours of searching, I was convinced that the bush I had picked berries from did not exist and would just *poof* disappear. I became obsessed to find out what it was, and - too many hours later - found a match. Rhodomyrtus tomentosa is not a guava, but it is a myrtle. It goes by a lot of names: Ceylon hill cherry, Ceylon gooseberry, downy myrtle, downy rose myrtle, hill guava, and other many acrobatic combinations of the aforementioned. According to the Internet, it is not known as "blueberry guava," and I hope here to correct that oversight. On the Big Island of Hawai'i, at least some folks refer to this plant at blueberry guava. Hopefully the next person searching for information when they randomly come across these on their property will not waste many, many hours in a wild gooseberry-chase. (If this is you, you have my permission to spend those hours in a hammock nursing a liliko'i margarita.)

You will notice that many of the common names are inaccurate - it's not a cherry or a gooseberry or a guava. The one that does pass would be downy rose myrtle, which honestly is not something that makes me think of yummy jam and that's what I wanted to do with these berries. So, my sweetie came up with the name "fubu" for fuzzy blueberry, and I quite like it.

The fubu plant comes from southern and southeastern Asia and is an invasive here, although not as common as waiawi strawberry guava. Despite being a pest, the plant has some nice qualities. The flowers are pretty and frequented by carpenter bees. Fruit flies seem to leave the berries alone. The specimens we've seen are more bush than tree, overshadowed by the waiawi.

fubu flowers, buds, and immature berries
Even when you know the right names to call these plants, the internet is not brimming with detailed information on them. I couldn't find nutritional information. Although I did note that some parts of the plant many be medicinal, including the leaves, which have some antibacterial properties.The leaves and stem also contain

Picking the berries is easy, since the plant has no stickers, and bugs don't seem to like them. Still, it took me a month to collect enough berries to make a batch of fubu jam.

fubu jam

First I sliced the berries and discarded the flower end. In this batch of jam are about 20 oz of slices. In the photo bellow, some of the berries are still a bit unripe. I found it was best to wait until they turn a deep purple color and become a little soft. They will ripen in a bowl on the table after you pick them, if they are already reddish.

fubu slices
I covered the slices with water and boiled about 20 minutes. (The smell pleasant, but quite unusual. I don't think I've smelled anything like it before.)

boiling fubu berries in water to extract juice
I then strained the berry water through a mesh strainer. I wanted some fruit fiber, not just the juice, so I forced that through with a spoon. The seeds were too big to fit through the strainer, and the skins were also left behind.

using the spoon, I mashed the boiled fubu through the mesh strainer
I collected this puree-like-substance for the jam. I had a little less than 4 cups. I added the juice of one large lemon and 4 tsp of the calcium solution you make for the Pomona pectin recipes. 

In a separate bowl, I mixed 1.5 cups of organic cane sugar with 2.5 tsp Pomona pectin. After the fubu juice reached a vigorous boil, I added the sugar/pectin and stirred until it reached a heavy boil again. At this point, I tasted the mixture to make sure it was worth putting into jars. (I had never had fubu jam, so I knew there was a chance it would be icky.) It was good! So into jars it went.

This recipe yielded seven 4oz jars. I then steam-canned them for 15 minutes.

fubu jam in the steam canner
The jam is a seductive color but honestly its taste is a little bland. I asked my sweetie to describe its flavor: "Like grape." Like grape but with a guava texture. I spent all that time to make grape jam? I think it is a bit more subtle than grape, though. And I do love the idea of eating invasive species, so I will probably make more. Next time I will probably use less sugar and could use less pectin, too.

That it tastes like grape has me thinking... fubu wine? Wikipedia says they make these into wine in Vietnam. I may have to try. That would take a lot of fubu berries.

Thursday, October 13, 2011

PotMaker: a clever, low tech gadget

As soon as I came across the PotMaker, I knew I needed one. This two-piece wooden toy helps the eco-conscious gardener roll small pots out of newspaper. The pots are quite small, but they are big enough to start seeds. An added advantage is you can transplant the entire pot, since the newspaper will soften and degrade in moist soil.

Perhaps the main attractor for me was that the newspaper pots are much cuter than the boring plastic pots.

bean seedling in a PotMaker pot

Making pots with the PotMaker is definitely craft-time of the Third Grade variety. In other words, it feels completely satisfying. The easy directions are clearly stated on the box. First, the newspaper needs to be measured and cut. While the length of the newspaper can vary from 10 inches or more, the width of 3.5 inches should be adhered to. I was quite pleased to come up with an adaptation to the basic protocol. I started adding an extra flap that can be tucked in the pot at the end to keep the end from unraveling out.

pots from the PotMaker
At first, striving too hard for perfect pots, I rolled the newspaper strips too tightly on the wood dowel. The newspaper should be wrapped loosely or it will take some effort to pull it off.

This would be a great project for kids. If I had one, I'd certainly keep him or her busy making me cute, re-purposed, DIY, biodegradable seed pots.

I love how many more of these newspaper pots fit in my seed germination area than of the larger, plastic pots I was using. I have noticed that they do dry out more quickly, so best to check moisture more often. That's no problem for me, since I love to moon over my seedlings.

All in all, a satisfying project and a good product.