Monday, October 14, 2013

Harvesting Pigeon Peas


Pigeon peas deserve their standing as a permaculture favorite. These plants grow fast, last for years, fix nitrogen, can be used as a "green manure" to feed other plants, can be grown as a hedge to block pigs' access, plus the peas are delicious. The pea can be used fresh, like other shelled peas or edamame soy beans, or allowed to dry on the plant to be used as a bean. Here in the windward tropics, using them fresh is much easier.

a beautiful day for harvesting pigeon peas
Our plants had two harvests this year, on in May and one in October. It takes a while to pick and shuck the peas, but it is easy, pleasant work with great reward.

pigeon peas on the plant


The pods are ready to pick when they reach full size. I like to gently squeeze the pods to see if the peas are filling out the bulges in the shell. Sometimes a pod can look ready, but the peas inside are still small.


shucking pigeon peas


I rinse the pods and leave them an hour or so to dry a bit. To shuck the peas, pry the two haves of the pod apart - it gives easily. Each pea needs to be freed from the pod.


quinoa salad with pigeon peas

I used these pigeon peas to make a simple salad with quinoa, carrot, olive, soy sauce, and balsamic vinegar. The peas a lightly steamed. In the past, we've used them in soup, stir fry, and on salads. Yum!

The internet is full of great pigeon pea resources and recipes. Here are a few of my faves:

basic information from tropicalpermaculture.com
nutrition information from sfgate.com
pigeon pea recipes from epicurious.com

Sunday, September 22, 2013

Evil Princess Jungle Delight - local ingredients recipe

 Evil Princess Jungle Delight

We entered this all local ingredients recipe in the La'akea cooking contest and won the savory category. This appetizer is perfect party finger food and is very easy! The rich goat cheese and mac nut flavors are augmented by the sweet and crisp mammee apple and the fresh spice flavors of basil, thyme, and edible hibiscus are a wonderful counterpoint.

Ingredients:

8 oz locally made goat cheese - we used Lava Rock "Natural"-flavor Puna Goat Cheese
1 cup crushed local macadamia nuts
3/4 cup diced, fresh, local mammee apple - could substitute many other fruits, like apricot or persimmon
fresh thyme leaves to taste - from our garden
fresh minced edible hibiscus leaves to taste (and for color!) - from our garden
washed & dried fresh basil leaves - from our garden
optional basil flower garnish - from our garden

crushed mac nuts, goat cheese, diced mammee apple
Ingredient notes:

The measurements above are approximate and can easily be altered depending on your taste and what you have available. The thyme and hibiscus are not critical. Next time I will probably add some nasturtium flower for a peppery flavor.

Instructions:

Wash and dry basil leaves. We used about 30 leaves for about 1/3 of the cheese/nut mix.
basil and hibiscus washed and drying
Prepare indredients - dice mammee apple, crush mac nuts, and mince hibiscus.

mammee apple, my new favorite fruit

Mix the goat cheese and mac nuts with the thyme, hybiscus, or other spices.


Fold in the mammee apple.


Place about a teaspoon of cheese mix on each leaf and top with a flower or other garnish.


And you are ready to feed any evil princesses wandering through your jungle!

Evil Princess Jungle Delight
Mahalo nui loa to La'akea for the inspiring contest and seed exchange event! Mahalo nui loa to Island Naturals for donating our prize!

Saturday, September 21, 2013

La'akea Seed Exchange 2013

La'akea intentional permaculture community is figuring it out and passing it on. They grow much of their own food as well as teach classes about tropical permaculture. Today they hosted a seed/cuttings exchange, local foods cooking contest, and potluck. Teaching people about and building community around locals foods was clearly the goal. Dozens of people participated on this sunny and rainy Puna day, and the energy of kids and dogs running around created an infectious excitement.

La'akea's panel of local food experts

The morning's activities included a panel of knowledgeable and informative local food experts. Led by Stuart Blackburn, the panel included:

Dija of Dragon's Eye Learning Center walked us through the steps of making yogurt and yogurt cheese from raw milk.

Jen of Paradise Nectar talked about the need to let bees defend themselves against their newest foes: hive beetles and mites. She keeps bees using natural methods, without chemicals or antibotics, with great success. She discussed types of bee products and her newfound hobby of mead-making.

Tracy of La'akea has been experimenting with local-growing grain four substitutes. Her favorite finds so far are taro, cassava, and peach palm flours. She finds that mixing these flours can produce a balance between good nutrition and usable texture.

The audience talk story that followed was full of useful information and thoughtful questions. It is clear that the Puna community is embracing the challenge of local foods.

A site tour and marimba concert rounded out the fun day. We were delighted and humbled to learn that our entry into the cooking contest took the "savory" prize for our "Evil Princess Jungle Delight" dish! (Recipe to follow.)


Wednesday, March 14, 2012

Recipe Remake: thumbprint cookies with Hawaiian ingredients

I'm currently collecting recipes that can be made with only island-grown ingredients. Grains pose a particular challenge, since they are the staple of so many people's diets but aren't grown here. Breadfruit (called 'ulu in Hawai'ian) is a potential grain-substitute in many recipes. In addition to being a plentiful, local food, it is healthier than grains, too!

In the following recipe, I've adapted one of my favorite cookies to use 'ulu instead of flour, macadamia nuts instead of pecans, and coconut instead of oatmeal. It uses no additional sugar or oil. I used cardamom instead of more traditional spices, because I love the way the delicate complexity of the spice interacts with the sweet 'ulu flavor. Cinnamon, nutmeg, and other cookie spices could be used instead or in addition.

The resulting recipe is easy, healthy (for a dessert), and can be sourced completely locally! Plus, these cookies are gluten free and vegan, and still: delicious! The proof? They won Best of Show in the Puna 'Ulu Festival recipe contest a few weekends ago. It was my first cooking contest entry - I was so delighted!


*award winning* Pūnana Cookies

for about 2 dozen cookies:
1&1/2 cups ripe 'ulu, steamed - use breadfruit that is sweet and mushy
1 cup finely chopped raw, unsalted macadamia nuts
1/2 cup shredded, dried, unsweetened coconut
Pinch sea salt
1 teaspoon cardamom
tart jelly/jam - liliko'i ginger jelly is especially ono
Macadamia nut oil for pan, optional
Preheat oven to 350°F. 
Mash steamed breadfruit using a crank processor, a potato masher or a brief pulse in a blender.  The resulting paste should be sticky and clumpy, like buttermilk frosting.
Put the macadamia nuts, coconut, salt and cardamom in a mixing bowl and fold in the breadfruit paste, much like mixing butter into a batter until all the ingredients are well incorporated.
Either wipe a cookie sheet with macadamia oil or use a non-stick cookie sheet.  Take about one tablespoons of breadfruit batter and roll into a ball.  Form the dough into a nest with an impression on top for the jelly.  Wet hands can help form the well-structured nest.  Fill the sheet with the nests about 1 to 2 inches from each other.  Then add about 1/2 a teaspoon of jelly to each nest.  Liliko’i jelly is ono because of its bright, tart flavor, but any firm jam or jelly will work.
Put the cookie sheet into the oven and bake at 350 degrees F for about 20 minutes, or until the cookies are lightly browned on the bottom and/or top.  Remove and cool on a rack.  Enjoy!

Now the pictorial tutorial:


Choose breadfruit that is soft (from ripeness not from bruising!) - it will usually be a golden color, but sometimes still green. A 2 lb breadfruit should be enough for a single batch. Steam for about an hour, then cut off skins and cut into chunks.

We use a simple hand-crank food processor.

Not much processing is needed for ripe breadfruit. It's consistency should be somewhere between mash potatoes and frosting. If the breadfruit does not stick together, try adding a little splash of water.

Processed ingredients (breadfruit, coconut, nuts, cardamom, salt) before mixing.

I've found that folding the breadfruit into the dry ingredients, much like you would fold butter into flour, works well. Mix with a spoon or spatula until ingredients are evenly distributed.

Use a nonstick cookie sheet or grease a regular sheet. I put a light coat of macadamia nut oil on my non-stick sheets. The oil isn't necessary, but increases browning. Take about a tablespoon of batter an shape a nest. Make sure the sides and bottom are solid, so the jelly can't leak during baking.

Add about 1/2 teaspoon of jelly to each nest. I use my homemade liliko'i-ginger jelly. I think any tart, bright flavored jelly or jam would be delicious.

In my oven set to 350 deg F, these cook for 25-30 minutes. I take them out when they start to brown. Then, they cool on a cookie rack.
Using the same batter and adding dark chocolate chips instead of jelly makes pretty darn good chocolate chip cookies. These are made with Scharffenberger chocolate chunks my mom sent. Thanks, Mom!

Wednesday, November 2, 2011

Basic Banana Care

Bananas are an amazing resource for a tropical homesteader. They grow easily, fruit quickly, and can be used green, like a potato in stirfries, or ripe, for a sweet addition to breakfast, quinoa salads, or desert. Bananas are also very healthy: high in potassium and fiber and good for your heart, eyes, bones, kidneys, and more. They pack a serious nutritional punch. Here in the tropics, we are lucky to have access to so many different types of bananas. If you don't think you like bananas, you may not have tried the right type, yet. I can't eat a banana on the mainland anymore - I yearn for the tart apple bananas of Hawai'i.

The land we purchased here on Hawai'i Island already had two large, one medium, and a few small banana patches (called "mats"). In the 8 months we have lived here, we are so fortunate to have enjoyed an almost constant supply of bananas of various types: apple, Chinese dwarf, Jamaican red, and other types we haven't yet identified.

Since the banana plants had been neglected for years before we bought the property, it took a bit of work to clear out the vines and weeds that were taking over. We heard much conflicting advice about taking care of bananas, some of which may only apply in certain areas (depending on elevation, water, and wind). The following has worked in our location, but your mileage may vary.
After being ignored for about 5 months, our medium banana patch was looking a bit shaggy (left photo). After about 10 hours of work pulling weeds and cutting down old leaves, it is in much better condition (right photo).
To take care of a neglected patch, first pull the weeds under, in, and around the plants, then cut off the old leaves and lay them in between the plants. This will help block sunlight to deter new weed growth and it provides a source of food as the leaves decay back into the ground. Since we live on the rainy, humid side of the island, it is important to encourage good airflow through our plants, and cutting the old leaves does this. Thinning the canopy also allows more sunlight to filter down to the keiki growing underneath. I usually visit the patches about once a week for maintenance.

Bananas like water, and they like food. They don't like weeds sucking up their nutrients or vines inhibiting their growth. Here in Pahoa, rain provides plenty of water. Our kitchen sink also drains into one of the banana patches. Many people swear by fertilizing their bananas, with chemical fertilizers, organic matter, or even rodents caught around their property. Other than feeding our bananas weed-mulch and their old leaves, we haven't provided any extra food. We find that our banana bunches are not as big as those of our friends who fertilize, but we get more than enough bananas for our needs. If that changes, we'll change our plan.
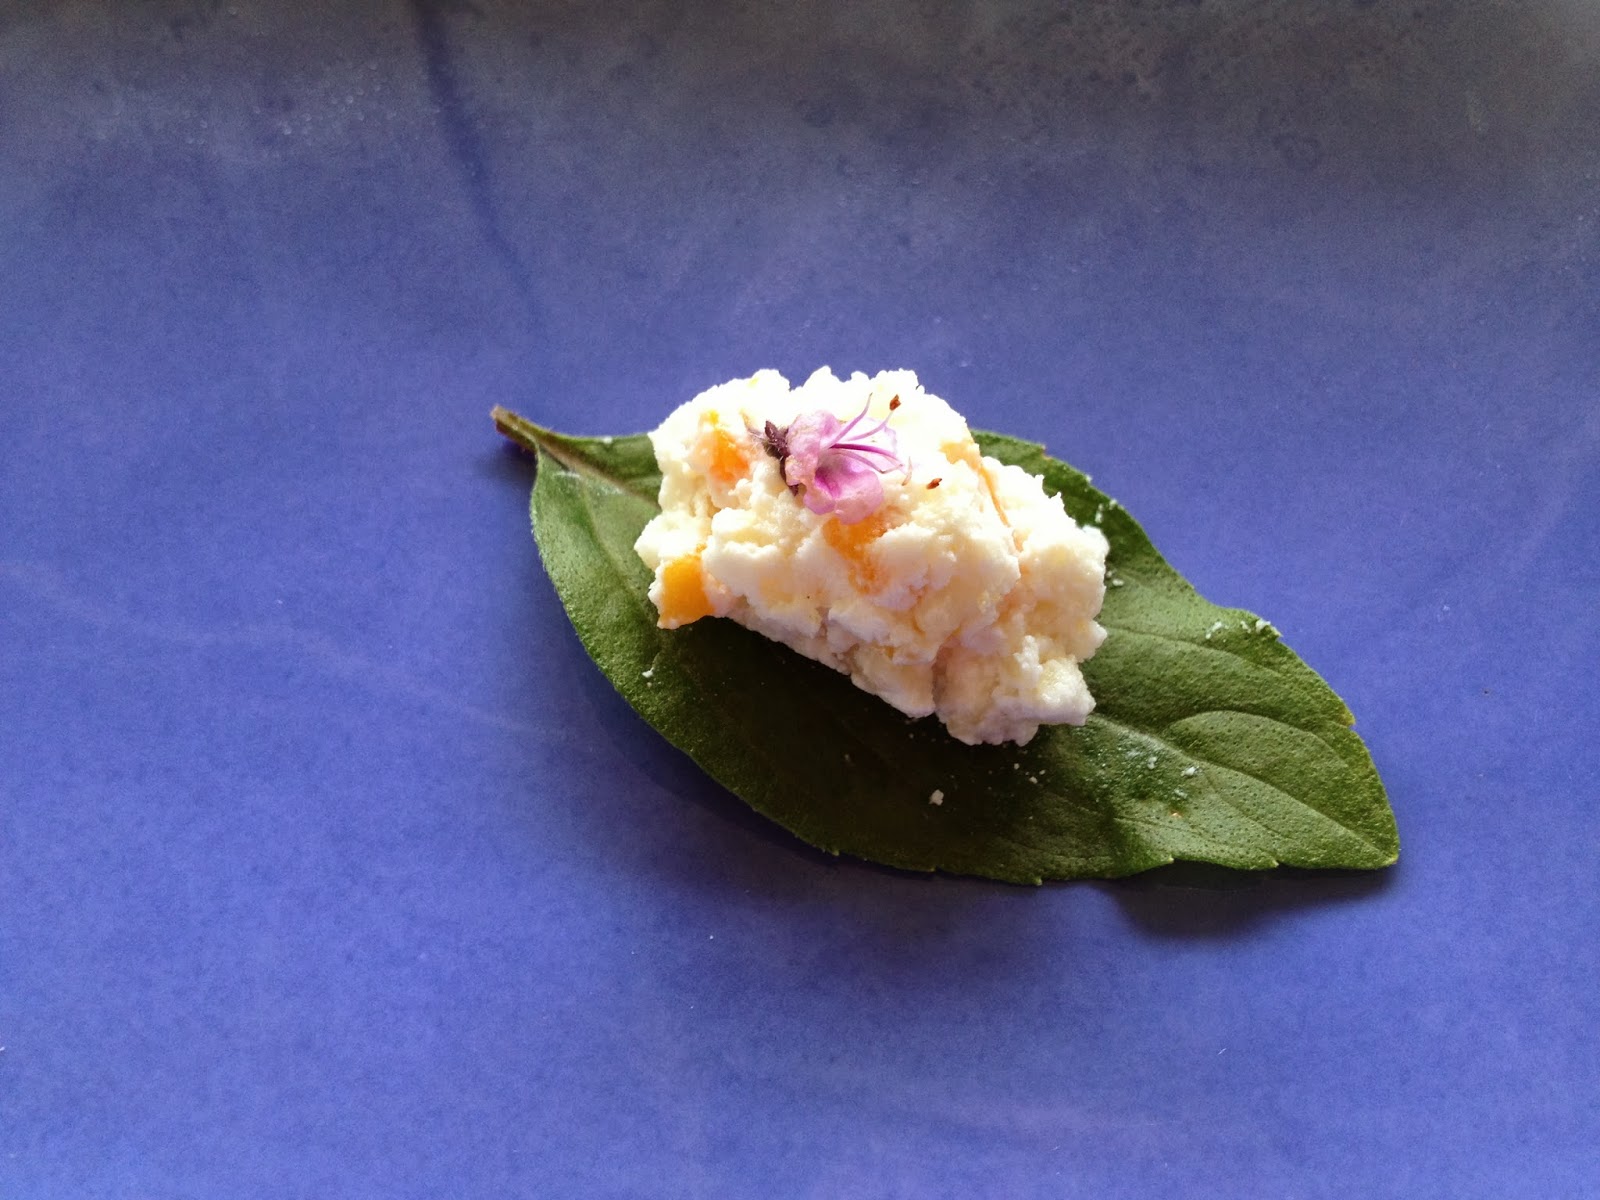
apple bananas and blossom
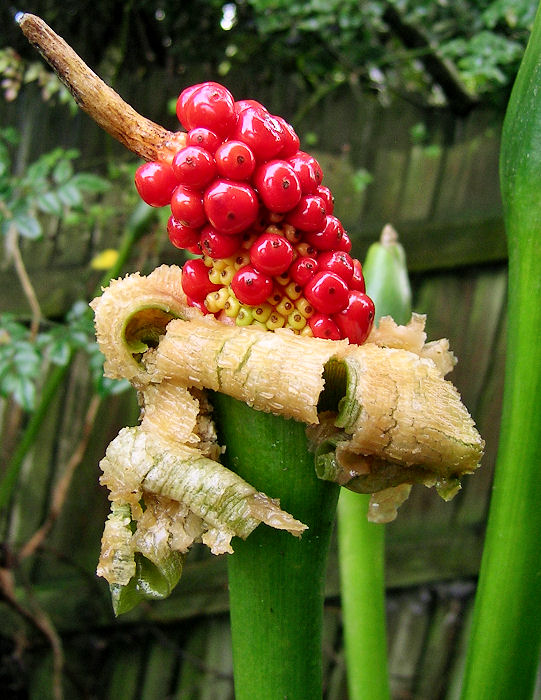
 When a banana plant puts out a flower, its leaves will all die off. Some people wait to harvest until the bunch starts turning yellow.  Others, including me, harvest when the bananas are light green, full sized, and start to become rounded in their edges. I also usually wait until the whole plant - leaves and blossom - look dead. To harvest, cut down the whole plant, save the bunch, and divide the rest of the plant into logs that stay in the area to feed the new plants.

We rinse and hang the bunch to dry on the front lanai, then bring inside to ripen when still green. We've found that fruit flies are less likely to bother the fruit when it ripens inside the house. We have a rope suspended above our kitchen counter to hang our current banana bunch.

The banana mats renew themselves by constantly putting out new keiki vegetatively from their roots. We have learned that there are two kinds of keiki: the thin ones with big leaves never put out good fruit, while the keiki with fat bases and thin leaves do. I plan to mark the keiki and follow their progress to see if this is true for us. Banana plants usually put out more than just one replacement keiki, so the mats should be thinned to avoid overcrowding. The removed keiki can be moved to a different location or given to a neighbor. I still have (moral) trouble thinning plants, so I have just let the keiki be, and, yes, our mats are a bit crowded! I'll take this next step soon.
On the left: "good" keiki with thin leaves and thick stem. On the right: "bad" keiki with wide leaves and thin stem.

Want more banana info? Try promusa.org.

Thursday, October 27, 2011

DIY Simple Plant Markers

As I started collecting more and more plants, I realized that my brain may not be able to hold all the identification information I was forcing into it. To prevent my forgetting what plant was where, I would have to mark them. I was going to buy plant markers but realized that I could easily make some from supplies I already had. (Plus, the ones I envisioned were cuter in their rustic simplicity than the mass produced markers I found for sale.)
DIY plant marker made from a waiawi branch
Simple is the right word. It's almost rediculous to post a "tutorial" for these, but since our busy lives don't always allow room for thoughts of the obvious I thought this worth posting.

Once you have a dried branch of waiawi (strawberry guava) or other overly abundant wood ( I usually use a diameter of about 1/2 inch),  takes about a minute to make a few of these. All you need to start is a dried stick and a clippers.
basic materials: stick and clippers
Using the clippers, cut the wood into pieces that seem to be the right length. I make mine about 8 inches long, but I don't bother measuring. I generally use straight pieces, but a little curve at the top end won't hurt, and even can look cute.
shaved marker sticks
Next, shave off an inch to 1.5 inch of bark at the top end to expose some lighter wood. I hold the clippers open and use the top blade to do this, but you could also use a pocket knife or any professional whittling tools you may have.
labels added with a permanent marker
At this point, I used to wait a few days to make sure the inner wood was dry, but now I skip that step and immediately write the labels with a permanent pen - a micron pigma type works great. I briefly entertained the idea of using a soldering iron to burn in the labels, but that just didn't fit in to my need for immediate gratification. I bet it would look cool, though, so if you do that please send pix.

These have held up well for me, even in this wet climate. And none have grown into happy waiawi trees in the middle of the garden, so all is good. Best of all, my brain needs to keep track of fewer things.

Monday, October 24, 2011

Pua Kalo: the taro flower in our garden

We were completely surprised and delighted to find this flower in the kalo patch. I'd never heard of taro flowers! Since the plant is propagated through vegetative means, I guess I assumed that it didn't flower.

We only discovered this treasure it because of the sound. The sound of dozens of swarming fruit flies, that is. They were all over that flower for the first day it opened, when it had a wonderful rose-y-butter-y smell.

kalo flower just opening, surrounded by swarming fruit flies
oriental fruit flies on kalo flower
 By the next day the flies had completely disappeared, and the flower was open.

kalo flower day two, fully open and without scent or flies
So, of course, I researched a bit about kalo flowers. The "petal" is a leaf that protects the flower stalk. The stalk has female flowers on the bottom, male flowers on the top, and some sterile flowers in between. It turns out that flowering is rare, and the anatomy of the flower discourages natural pollination. If our kalo flower does get pollinated, it will form a bunch of berries at the base of the stalk (maybe looking like this). Plant breeding programs have found a way to induce flowering and hand-pollinate to attempt to make new and interesting varieties.

Since kalo is propagated vegetatively, by transplanting corms, the strains we use are clones of ancestor plants and don't have much genetic variation. The potential for breeding kalo is kind of exciting.

But, there are already a ton of kalo types and the ancient Hawai'ians were quite adept at knowing where and how to grow each. I should learn to handle the kalo we have before daydreaming about new varieties!